Tuesday, August 24, 2010

Recycle and Give a Gift!


A few posts back, I showed you a tutorial I had found that solves the dilemma of having all those shopping bags pile up. Today, I'm showing you a tutorial I found on how to make your own gift bags with something you probably throw out on a regular basis. :D

While blog-browsing the other day, I found this idea over at Not So Idle Hands. It's an older post and she had Stephanie from Somewhat Simple as a guest blogger. I thought it was a cute idea and, since I actually had the materials up here in Mammoth Lakes, I gave it a try this morning. 
Here are the supplies that you will need: 

A Cereal or Snack Box
Mod Podge
Sponge Brush
Scissors or X-acto Knife
Hot Glue Gun & Glue Sticks
Wrapping Paper or Scrapbook Paper
Embellishments of Your Choice

Cut the top tabs off of your box.

Measure the length and width of your box and cut your paper to fit. I used scrapbook paper because that's all I had while up in the mountains for 7 weeks. However, after trying this project, I think the wrapping paper might be a little easier to work with. 

Use your sponge brush to cover your box with Mod Podge and adhere the paper to your box. Smooth out any bubbles or creases.

Make a crease on the sides of your box. Hopefully, your crease turns out being a little more centered than my crease did. :D 

With your scissors or x-acto knife, cut handles out on both sides.

Now....this is the part where I need you to use your imagination. :D 
Imagine the bag with yellow tissue paper sticking out and the cute blue raffia tied at the top. :D I don't have embellishments here, so that "cutsifying" will have to happen at a later date. That's what the glue gun is for though. Use rhinestones, ribbon or whatever your heart desires to make it pretty. :D I'm planning to put my little college sister's birthday gift in this. I figure she can use the "bag" for nail polish or manicure/pedicure supplies.

 I think this is such a cute idea and would be something fun to do with kids. It could also come in handy when you're in a bind and need a gift bag ASAP!
~~~~~~~~~~~~~~~~~
On a side-note, I had some leftover scrapbook paper and a brainchild. I have to wait til I get home and can get to my supplies before I can implement my idea though. Darn it! 
 In a future post, see what I make with these! :D 
Any guesses?


I participate in THESE AWESOME LINK PARTIES! Check 'em out!

Saturday, August 21, 2010

Check It Out! :D

Kenzie over at 9 O'Clock Dance of Joy is celebrating reaching 300 followers by hosting this fantastic giveaway! Check out this adorable monogrammed frame
Sign up to follow her blog and you can enter too! While you're over there, check out some of her great projects. You'll be inspired! :D 

Thursday, August 19, 2010

Baby Leggings At Last!

I've been wanting to try my hand at making little baby leggings for my adorable little niece for awhile now. The only problem.....I had no clue how to even work the sewing machine. My husband and I are spending about a month and a half in Mammoth Lakes, CA. I figured there would be a no better time to work on my sewing-knowledge deficiency than when I was holed up in the mountains. 

My mother-in-law sent me the following:
 However, this was still looking rather intimidating....

and this was looking even more intimidating. Sadly, I'm not joking...I had no idea what I was doing. 

Thankfully, I brought this along. :)

You can tell that my two little fur-babies were incredibly impressed with my efforts. 


My first successfully threaded bobbin. I know I'm being silly here, but I felt it should be documented for posterity's sake. 


I found a baby-legging tutorial HERE at Calico that looked like a good first project. 

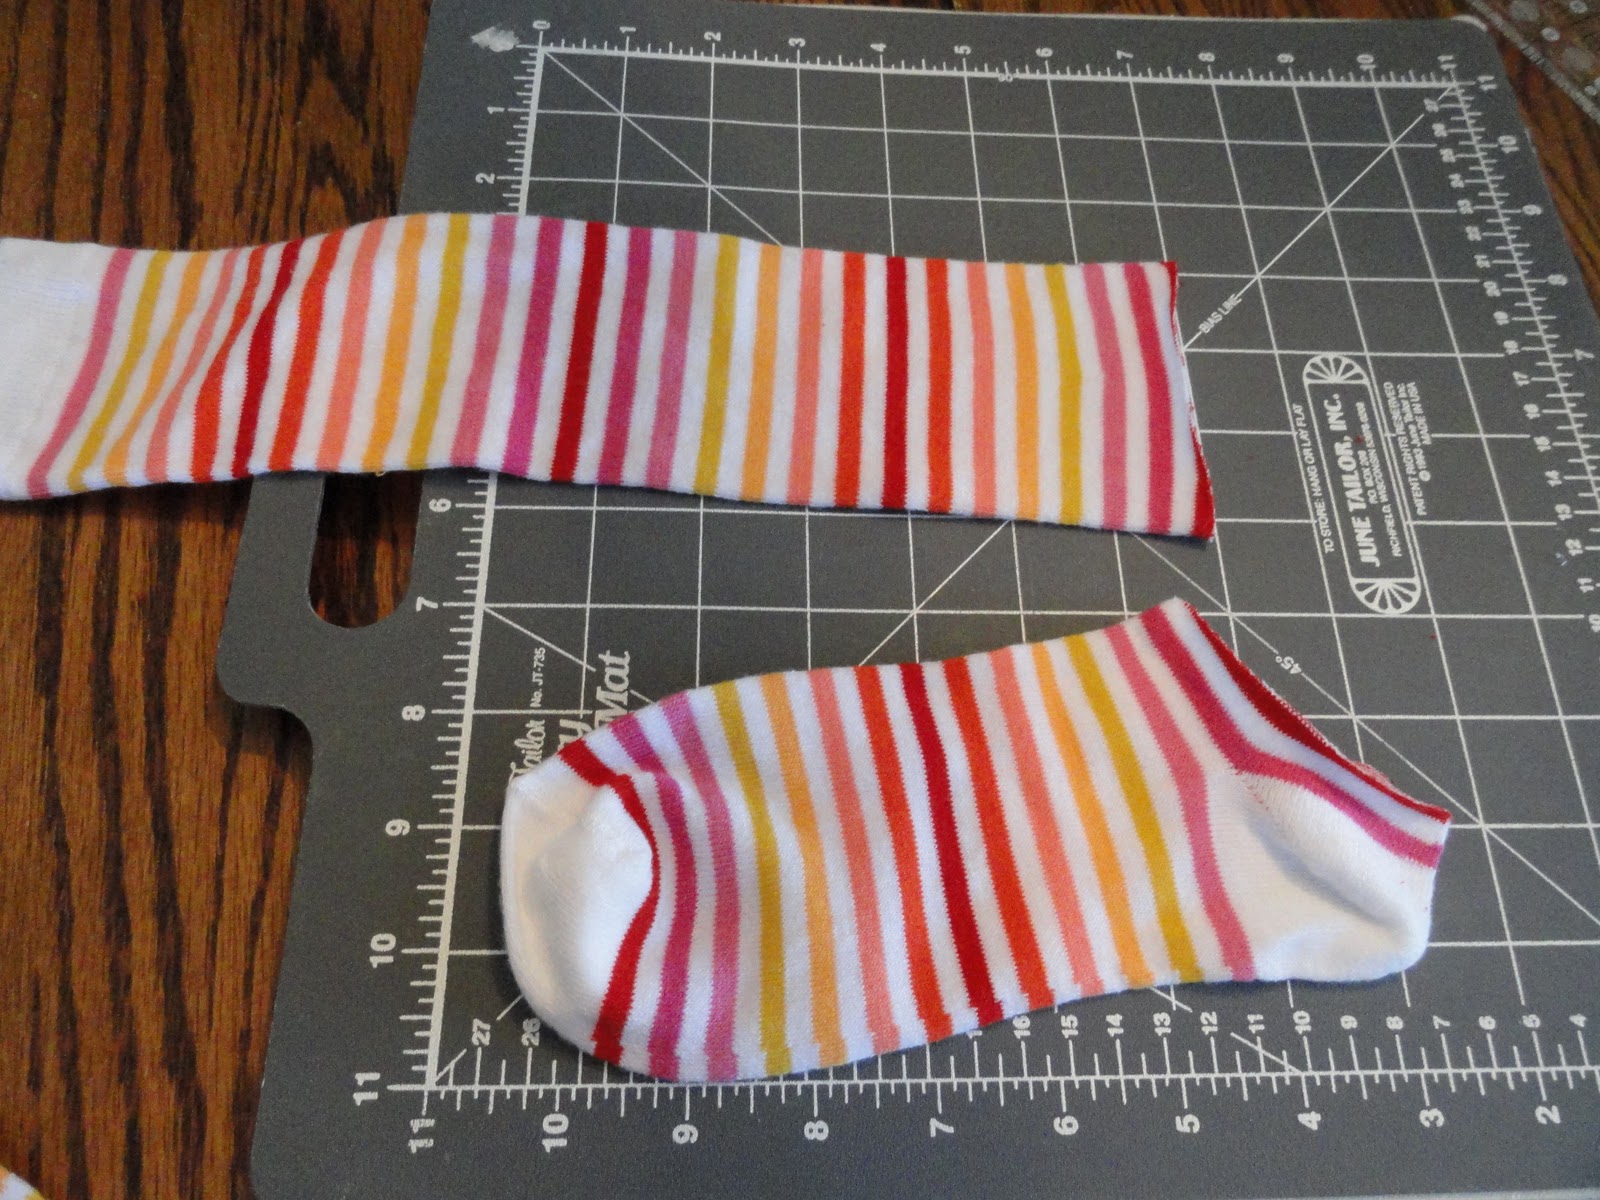
I started with these.
Cut off the feet...

and did a tight zig-zag stitch around the bottom. 
(Sorry for the side-ways picture. Cock your head to the left. :)

Here are the cute little leggings for my niece who is just learning to crawl. :) I can't wait to see how they look on her!

I did this with the part that was left over...I'm calling them footies. :) I think they're perfect little house socks or for putting on after the pedicure is dry. :) Maybe I'll put these in my little sister's stocking this Christmas. 

I had so much fun that I just kept going...

And that, folks, is the story of my first sewing project! I loved it and can't wait to learn more! There's a whole new world out there now! :D

I participate in THESE link up parties! Check it out!!


Tuesday, August 17, 2010

Shopping Bag Wall Art

So I was doing a little blog-hopping this afternoon and ended up finding this ADORABLE post over at In My Own Style. How many of you have a ton of shopping bags that you don't know what to do with, but don't want to toss out? 

How about a little wall art? What a cute idea! 


Click HERE to see the details of she did it.

I think my sisters Corrie and Caylen should start saving up their shopping bags for me so that I can make them one of these. :D 

Monday, August 16, 2010

Mice Cream

How is this for a fun end-of-summer treat for the kids? I found the idea in one of my cookbooks for kids and have made it for elementary and high school kids...it was a hit with both! :D 
I adjusted the recipe a bit and just used what I had on hand.
You just need the following: 
Vanilla Ice Cream for the mouse "body"
Three Chocolate-Covered Raisins for the eyes and nose
Two Round Mint Paddies for the ears
6 Chocolate Sprinkles for the whiskers

I didn't have any strands of licorice, but if I had it would have been the tail! :)
Cute, Cold and Fun


I participate in THESE link up parties! :D

Sunday, August 15, 2010

We're In Mammoth Lakes, CA....

and have been for about a month and a half. Thus, not much crafting has been done since I ran out of most of my supplies. I have, however, been ordering supplies online like a crazy woman and am excited about getting back down to the business of crafting when I get home. I've made lots and lots of pendants though! Below are a couple of my favorites(I won't bore you with showing them all).


I have all my birthday gifts and stocking stuffers ready to go. I figure I'd better get things done now before Baby Browne arrives this fall!

My mother-in-law is being a dear and, along with a few maternity items, is shipping me a rotary cutter and mat. Thus, this coming week, I'll begin my journey of trying to figure out how to work my simple little beginner's sewing machine and how to make baby leggings for my niece. She won't quite be a one year-old at Christmas and I really don't think she'd appreciate jewelry quite yet.

I'll keep you posted as to how the sewing goes. I'm wishing I had my mom or MIL here with me to give me a crash course and I'm WISHING, WISHING, WISHING that I had learned to sew years ago. I'd be so much further ahead right now! :D

Meanwhile, until my package arrives tomorrow or Tuesday, here are a few pictures of me and my little family enjoying our time in Mammoth.

My Husband


His Bike, Not Mine :D


Our Two Little Wet Fur-babies Loving the Lake


Going to Dinner - Not too many dates left before baby arrives! :)

Monday, July 19, 2010

Cute Clothespins and More Pendants

As promised earlier today, here is a picture of a few of the things I've been working on. I tried my hand at the cute clothespins I saw over at Brown Paper Packages and, as you can see, I got a little carried away. They were so fun and easy to make.


Here are a couple of my favorites...

A few ideas for these: Magnet Clips for the Fridge, Photo/Christmas Card Holders, A Jillion Different Uses in the Office or Classroom..... What other uses can you think of? Let me know!!! 

Below are some glass pendants that I've been working on the last couple of days as well. I blogged about these here


MIA For Way Too Long!

So sorry to have disappeared for such a ridiculously long time. Lots of crazy busyness going on as of late...birthday, holiday, brunches, traveling, getting ready for baby, etc. etc. However, I have fit in a little bit of crafting here and there. I've been making glass tile pendants and magnets for Christmas and birthday gifts. They're turning out so cute. I'll take a picture and post it this afternoon!

For now, let me share a really cute idea that I found over at one of my favorite sites, Brown Paper Packages. :D Click HERE to see this adorable and easy project.


I'm trying my hand at making some today and will post the results this evening! :D

Thursday, June 24, 2010

Chore Chart from Brown Paper Packages

Check out this adorable chore chart from Brown Paper Packages HERE. What a great idea! For all my teacher friends, wouldn't this be cute adapted to classroom jobs! I can think of a ton of things to do with those cute clothespins alone! Love it!


Wednesday, June 23, 2010

How CUTE are These Burp Rags???

I've recently discovered this adorable blog, The Autocrat. Check out the burp rags that she makes HERE. I am IN LOVE with them!!!! Check out the brown and cream line! Don't you think our little guy needs some of these?? :D

So, So Cute!!!

Sunday, June 20, 2010

Home Project On Father's Day

We have had pictures that we've been meaning to hang since we moved in....about 9 months ago. Finally this morning we got around to it! These are Southern Living at Home prints that I bought when they went on liquidation. I got the frames at Michaels on clearance and just added cardboard to the back and taped it down with packing tape. Not fancy, I know. But really...who sees the back? We're on a budget and going for great decor without spending lots of $$$. :D The hooks are some of my all time favorites from Ballard Designs that I asked for for Christmas several years ago. Here is the before and after. :D

BEFORE


AFTER

So much better than a blank wall! :D

Linked Up With:
  House of Hepworths


Monday, June 14, 2010

A Desk Makeover I LOVE!

A couple of weeks ago, I was out garage-saling, looking for baby clothes for my little man. There was a garage sale right down the street from me that was a God-send - literally! I found a friend AND an adorable desk! :D The new friend has a cute 5 month-old little boy and I found a few outfits for my little guy. She also had a desk sitting there with $15 on it. I knew as soon as I saw it exactly what I wanted to do. However, I wasn't quite ready to pay $15+the cost of the makeover. I gave her my email address and phone number and asked her to call me if the desk didn't sell. That evening I got a message from her letting me know that she still had the desk and that, if I wanted it, I COULD JUST HAVE IT FOR FREE!!! :D Whoo Hoo!!! What an unexpected blessing. I love it when little "happies" just fall into your lap like that! 

Below is the story of my little desk makeover....

Here is the "Before" picture of the desk


The baby's crib had just been delivered, so conveniently, we had alot of cardboard to lay out on our pavement for the painting project. We removed the drawers and got out our WHITE Rust-Oleum spray paint. It's my favorite because you can hold it at just about any angle and it doesn't clog up on you. I also used this same type of spray paint for my bathroom cabinet makeover.


Because I'm not supposed to be around paint fumes while I'm pregnant, my wonderful husband painted the desk for me while I watched behind the closed glass door. Our little fur-baby Lexi was trying her very best to be his little helper. :D 


What a good man! :D

Below is the desk after one light coat of paint. We still had another coat to go.


After the 2nd coat of paint, Dan and I headed down to my ALL-TIME FAVORITE STORE, Anthropologie, and found some adorable knobs. This evening we put them on and the desk looks exactly like what I had pictured in my head when I saw it sitting out at the garage sale!! I had a chair with a black and white toile cushion that I had purchased via Craig's List several years ago.....and here is the completed project! :D


I LOVE, LOVE, LOVE it!! :D 

What is even better though is the fact that I've also made a new friend who is just as cute as she can be! She was just over this past weekend for a lady's brunch and I snapped a quick photo for the blog. :) 


Thank you, Charisa, for the desk donation! It's a perfect little spot for me to learn to sew and to work on my little craft projects! :D 


HookingupwithHoH

http://www.thethriftyhome.com

Related Posts Plugin for WordPress, Blogger...